Canva Pro users have access to Brand Kits.

Consider starting a free 30-day Canva Pro trial if you’re not already a user.
If you decide you don’t need the Pro features before your trial is over, you can always cancel and you won’t be charged.
Table of Contents
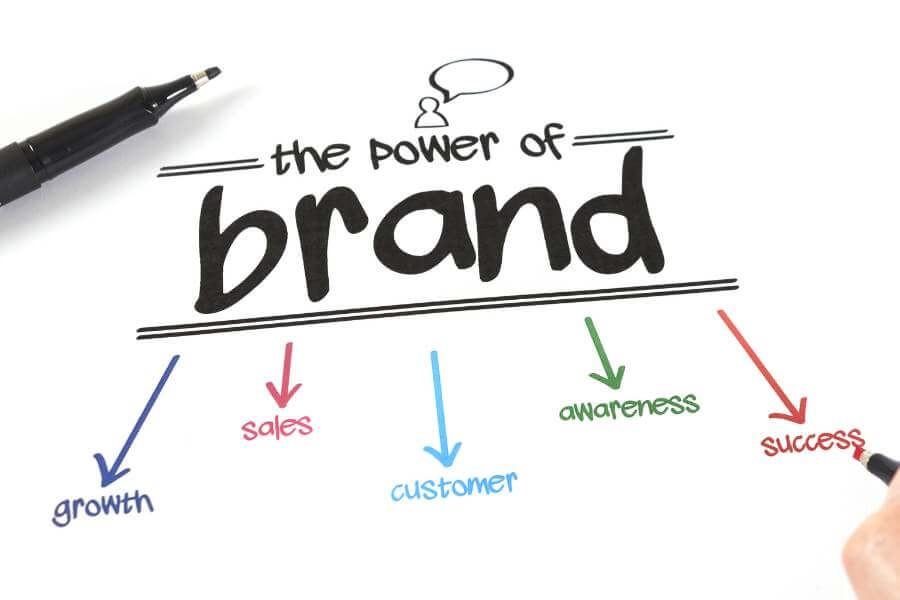
What Is Canva Brand Kit?
You can save all of your brand assets, such as logos, color schemes, and fonts, in one place by creating a brand kit in Canva.
A brand kit enables you to readily access all of your brand assets during the creative process once it is set up.
You can upload your logos and unique fonts with Canva Pro, add different brand kits and have an infinite number of color palettes.
Canva Free Users Access Brand Kits?
Yes, but only with very basic features.
As a free user, you are only permitted to have one brand kit, can’t submit your own fonts or logos, and can only use a palette of three colors.
How Should Your Brand Kit Be Set Up in Canva?
You can submit your whole brand style guide using the Brand Kit, which is located on the left side of your Canva Dashboard.
This makes it incredibly simple to access no matter what project you are working on.
No more searching through your files for your logo or attempting to recall the hex codes for your brand’s colors.
I’ll now walk you through setting up your brand kit in Canva and locating it quickly from the design screen.
Step 1: Put Your Logos Online
This is what the Brand Kit will look like once you’ve accessed it from the Canva Dashboard’s left side.
Uploading your logo and any variants, such as submarks or icons, should be your first priority.
You have two options for adding your logos: drag and drop the logos from your computer’s folder or click the Plus sign next to Brand Logos and choose your logos from your computer.
Make sure your logos are high resolution and in the PNG or SVG format so they may be put over any color or picture and have a translucent backdrop.
I strongly advise having several different logos.
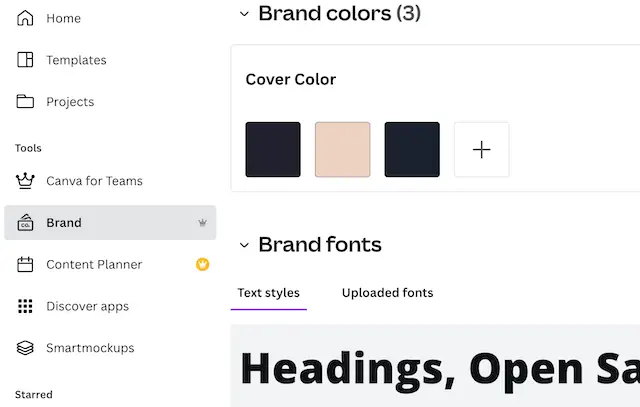
Step 2: Choose Your Brand’s Colors
You should then input your brand’s colors. You must be familiar with each color’s HEX code in order to accomplish this.
You may either choose a color from the color wheel or click the Plus under Brand Colors and enter your HEX code.
However, I would strongly advise conducting research to make sure you choose brand colors that will complement your company’s image and draw in your target market.
Most brand palettes consist of 5–6 colors, however, you may add as many as you wish here.
You may also choose to name your brand color palette.
Simply write your preferred title where it says “untitled palette” by clicking there.
Custom Fonts
Although Canva has a large library of fonts to pick from, I’ve moved this step ahead of our third and final stage, choosing brand fonts, since there are some incredible designers out there creating lovely fonts that it would be a pity not to be able to utilize in your designs.
Not all of them are accessible in Canva.
Fortunately, there is a quick remedy!
A section labeled “Uploaded Fonts” may be found in the bottom right corner beneath Brand Fonts.
It’s vital to point out that these are just the fonts you’ve selected to upload and are not your Brand Fonts.
In Step 3, we’ll choose the brand’s typefaces.
Make sure the typeface you wish to upload is saved on your computer before you do anything else.
If not, you’ll need to download it from Google Fonts or the store where you bought it.
Navigate to the location on your computer where the font is kept by clicking the ‘Upload A Font’ button.
OTF, TTF, and WOFF font formats are supported by Canva. Select the file you want to upload, then click Open.
Keep in mind to only upload fonts that you have permission to use.
If you have a license or other permissions to use the typeface, you will be prompted. If you do, click “Yes, upload away!” to confirm.
When your font is successfully submitted, it will show up in the brand kit’s “Uploaded Fonts” area.

Step 3: Select Brand Fonts
The choice of your brand typefaces is the last step in assembling your Brand Kit.
You may select the fonts for your header, subheadings, and body text as well as the size of each type under “Brand Fonts.”
I like to utilize the choice of my subheading font for my accent or script font because it is the same as my heading font.
Click on the text that says “create a heading style” to add your first brand font.
You may choose your preferred font and size in a little window that will appear.
To locate your preferred font, either uses the search bar or just scroll down until you see the list of fonts you recently uploaded.
Follow the same procedure to change the body font and the subheading font.
Getting to Know Your Brand Kit
You can now simply access all of your brand elements from within the design editor after uploading everything to your Brand Kit.
Colors
Select the element you want to edit in order to make it one of your brand’s colors.
On the left side of the top editing window, a tiny colored square will emerge.
When you click the square, a color panel will show up beneath Document Colors.
If you provided your palette with a title, it will show up here above your colors. You will see your brand’s colors.
Similar to changing an element’s color, you may change the font’s color by selecting the desired font, but this time, instead of a square, you’ll see the letter A with a colored bar beneath.
After selecting this, the color panel will appear again, allowing you to select your brand’s color.
Logos
You should notice a tab labeled “Logos” on the far left panel of the page where you may access your logos.
All of your logo options and icons may be found here.
Simply select the desired logo to include in your design.
Fonts
When you upload your brand fonts, your selected font will automatically be used whenever you pick a header, subheader, or body text box.
The current font will be displayed in a dropdown option on the left side of the top editing panel whether you are working from a template or just want to use a different font.
When you select a font from the drop-down menu, it will first display the fonts that are currently being used in the design, then any fonts that have been used recently, and finally your brand’s fonts.
After choosing the typeface you want to use, change the font size as necessary.
You now have everything at your fingers in an instant.
No more searching through hundreds of files to identify your logo or attempting to recall the hex codes for your brand’s colors.
In all honesty, I prefer basic time-saving techniques.
I really hope you found this article to be useful.
Also, don’t forget that you can get my brand style guide Canva template for free to follow each step in developing a strong and consistent brand for both yourself and your blog.

Creating Your Canva Brand Kits Has Advantages
You now understand what a Canva brand kit is and how it differs from a standard branding kit.
You’ll learn why you should take 15 minutes to put up your brand kit in Canva in this part.
1. Provides a Useful Guide to Everyone on Your Team
Members of your team have quick access to your brand’s colors, logos, and fonts thanks to your Canva brand kit.
No team member will have a reason to deviate from the brand as a result.
Your virtual assistant may access your Canva brand kits and utilize them regularly if you use one, which is customary for company owners.
2. Keeping Consistency and Being Brand Consistent While Designing
For your brand to be recognizable and to provide your readers with a positive user experience, you must maintain brand consistency.
The Canva brand kit is a fantastic resource for developing these interactions with your readers.
3. Stop Wasting Time
You must always manually add your brand’s colors and fonts to your designs if Canva doesn’t contain your brand kits.
You could also occasionally feel tempted to choose any color or font.
You won’t have to worry about manually adding colors and other brand components or about keeping on-brand once your brand kit is set up in Canva.
You now understand the distinction between a brand kit and the built-in brand kit in Canva, as well as the benefits of creating a brand kit in Canva.
Even so, you must have certain brand components prepared in order to construct a Canva brand kit.
Final Thoughts
One benefit of having a Canva Pro account is access to the Canva Brand kit, a time-saving tool.
I didn’t bother putting up my brand kit when I first started using Canva pro for designing; instead, I rushed right into making Canva templates to sell.
Right up until someone mentioned it one day over a zoom call, at which point I set up my brand kit.
I have a lot more time because of my brand kit.
Therefore, as a company owner, you are losing out on a lot of lovely, time-saving, and distinctive Canva features if you don’t have a Canva pro account.
Further Reading: